Monday, April 7, 2014

Running High (April 2014)

So, I've been participating in this training program through a local running store, Runners High 'N Tri, twice a week with a great group of ladies for the past 5-6 weeks or so, each with a goal of completing our first ever 5K or 10K race.  We've really been troopers, I must say...venturing out in as low as 10 degree weather with our extra-warm thermal leggings on just for the sake of training for race day.  Well, the day has come and gone as of yesterday.  

I am so very proud to proclaim that I completed my very first 10K at about a 10-10 1/2 minute mile pace (and still walking around today without much of a limp!).  It was a run to benefit our town's performing arts center, so costumes were encouraged at this "Red Carpet Run."  I had on a little black cotton dress over my running gear along with sunglasses and a string of pearls, Breakfast at Tiffany's style.  To keep me going for the last leg of the race, my family got dressed up and cheered for me on the sidelines too.  My daughter even spontaneously joined in to run the last 0.25 miles with me at the last second...what a way to finish the race!  Lots of cheers, loud music, and my little girl and me all dressed up and running together!

In order to thank the store, my new running buddies, and importantly, our great coach, Michelle, I thought a tray of cookies might be nice.
Good carbs, right?


I only had men's loafer cookie cutters (and I can't even believe I owned those), but after seeing Bake at 350's running shoe design, I just tweaked the loafer to try and look a little more athletic.  I think it still looks a bit like a golf shoe or cleat, but it would have to work.


Partially due to some laziness, I didn't outline and flood these cookies, but rather used 20-second icing for each section.  It made the project go faster, but after the cookie had dried, the icing didn't look as even and clean.  Ah well.


I had some fun with the store's logo.  I printed off the "R" from their website on a piece of paper, and put some wax paper on top of the copy.  I then piped the red icing on the wax paper to match the font as closely as possible.  Then, once it had dried, it easily transferred onto the wet white-icing cookies.


I'd like to say we all "paced" ourselves, but I think some of us ate 3.1, well, maybe 6.2 of these cookies all in one night.  :)  
I won't call anyone out on that, right Michelle?


 What a great store I've discovered with a very friendly staff and coaches/trainers who really care for the runners.  I did sort of get that "high" after running the race and even after some training runs.  They're trying to convince me to train for the half-marathon...I just don't know that my body is made for that.  We'll see...maybe this won't be the "finish line" for me just yet.


Thursday, April 3, 2014

One is Silver and the Other's Gold...(April 2014)


Do you remember that old Girl Scout song?  "Make new friends, but keep the old...One is silver and the other's gold."  I don't know how that random bit of music history came into my head, but I'll weave it into this blog post somehow.

Through preschool and park district classes, I'm meeting so many moms and parents with kids the same age as mine.  Although it can be tricky to find parents I enjoy who have kids my kids also enjoy, that is no longer the case with my great group of dance moms.
(Yes, I guess that's what I am now.)

There's a group of at least 5 of us who seem to have so much in common, and the girls have become fast friends.  Well, as a favor to one of them and her sister, I made these cookies.  They are planning a wedding shower for a couple whose colors are, well, silver and gold.
(See, my title makes sense after all.)


 These hearts were for the bride and groom, using some inspiration from an older post of mine, but with grey instead of black tuxes to match the color scheme.


The real fun came when it came to designing the full gown variations.


I knew I wanted to incorporate brush embroidery for details, especially since my color palette was fairly limited.


I also used some gold and silver luster dust to brush on a bit of a shimmer, but it didn't turn out quite as shiny as I was hoping for.  I might need to revisit this technique in the future and/or look into disco dust.  (Doesn't that just sound like fun?)


Still, I was pretty happy with how the ruffles turned out.


Their plan is to place each gown in a favor bag with a gold/silver ribbon as a favor for each guest at the shower.  So pretty!  
But, I couldn't resist a photo with them all together on a platter.


A fun project that I gladly completed for a (new) friend.  
Hope the shower is beautiful!

Thursday, March 27, 2014

Birthday Bouquet (March 2014)

Growing up in a house with two younger brothers, at times I would be jealous of my friends with sisters...someone to understand all that girl stuff plus double the wardrobe to share, right?  Well, it's not like I don't love my brothers, but I admit that I feel lucky to have some pretty awesome sister-in-laws (all of whom also grew up as the oldest with only brothers as siblings...there's an unspoken bond there for sure :)

One of my sister-in-laws just had a milestone birthday, and although she is still younger than me, I won't disclose her age just in case.  However, we had a little family celebration, so I definitely wanted to contribute some dessert...cookies.


The flowers were pretty straight-forward using, well, flower cookie cutters both big and small.  I used The Cookie Artisan's Springtime in Paris cookie platter as inspiration, but I wanted to add leaves to the some of the cookies for a little variety.


I used different sizes from Wilton's leaf fondant cut-out set, and I overlapped the flower and leaf with the dough prior to baking.  I think the double-leaf flowers are my favorite (but they were pretty big!).


Using the same colors, I had some fun making the monogram cookies, although it took a bit of trial and error.  Originally, I had photocopied some monogram initials I liked, put some wax paper over the paper, and piped the icing on top of the wax paper.  However, next time I'll need to choose a thicker font and be more patient in the drying process, as they all broke when peeling them off the wax paper.  Ah, live and learn.

I ended up free-hand piping the letters on after some practicing.  And, although each "R" looked a bit different, they all got the message across.  :)


I liked this little design so much that I made "M" and "C" monogram cookies and placed them each in a favor bag with accompanying flowers for other friends in gratitude and for celebration.


This color palette just makes me think of spring.  As of March 20th, it is officially here...


And to my awesome sister-in-law, Happy Birthday!

Friday, March 21, 2014

New Babies (March 2014)

 A few of my family's friends recently had new babies born, a little girl and a little boy.  So, to help them celebrate, I rationed off some of my cookie dough intended for a large platter of cookies, and created a little favor for each of them.


For little Jane, I used a onesie cookie cutter and one of my favorite "baseball tee" designs.  
Then, I thought I'd try one of Sweet Ambs' floral patterns as seen on her blog.


The whole design is made with wet icing, so I had to work quickly, but I was pretty happy with how they turned out, especially for my first try.


 The mini swirl roses were Sweet Sugarbelle's design and made while also creating the wedding shower platter for my co-worker.  
(Actually, all of these colors can be found in that cookie platter, making the mixing of icing colors not any more labor-intensive.)


For Chase, I used a bear cookie cutter, starting first with his belly and snout, then adding his head, feet, and ears with 20-second icing, and finishing up with his arms and a small blue heart (Build-A-Bear style).  His eyes and nose were drawn on with a food-coloring marker.


Such fun occasions to celebrate.  
Congratulations to all the new parents and grandparents!

I think this is one of the reasons why I continue to love decorating cookies...a very positive undertaking, celebrating life's most joyful moments.  
Aww, hugs and kisses all around!

Saturday, March 15, 2014

Frozen Friends (March 2014)

Ah, birthday season is upon us at our house, and this year, the theme was easy.  Disney's "Frozen" movie has seemed to become intertwined in just about all aspects of our lives since its viewing in late December.  We dress in their costumes, sing the songs, watch the you tube videos (now limited to 1x/day!), and make-believe we are the different characters daily.  Not only was it our daughter's first movie in the movie theater, but it soon became our son's first too.  We found one of those sing-a-long showings, and wow did they sing!  It's amazing how they really have no inhibition at this age.  And, it's so fun as parents to watch them watch/sing/play with something that they are so in love with.

So, Frozen it was for the birthday party.  Since she was set on character cookies, which were quite a challenge, we opted for an easy brownie dessert (with a decorated cookie as a garnish).


I found these snowflake sprinkles from Kreative Baking Shop on Etsy, and I thought their colors went well with the Frozen decor.  The brownies are actually a recipe I found on Bake at 350's blog, and they are the best (if I may say so!).  She calls them "Birthday Cake Oreo-Stuffed Brownies," and they are exactly what you think.  Birthday Cake flavored Oreos baked inside these fudgy brownies...yum!


  The cookie platter was more time consuming.


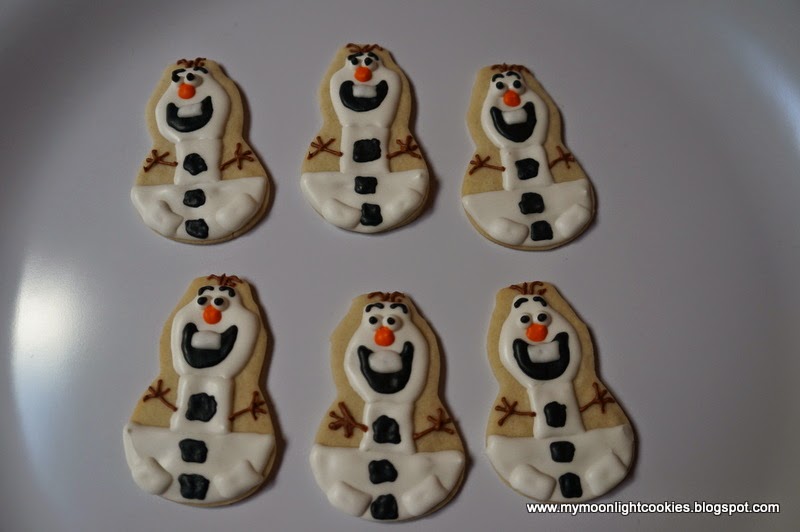
 I played it safe with my go-to snowflake minis and new favorite snowman, Olaf, as seen in a previous post.  He was made from a snowman cookie cutter, with the hat trimmed a bit.  He was a necessary addition to the platter, especially with all the boys we had at her birthday party.


I was much more worried about the Anna and Elsa cookies.  I found some cookies for sale on Etsy from Pastry Tart Bakery for these characters that helped me form my own design.  Here is their take on Anna and Elsa.  I liked how they sort of cropped the girls' dresses and how they styled their hair, but I wanted my girls to have their eyes opened, a risky endeavor I later found out.


You know, I am not the best at free-drawing, especially when it is Disney I'm trying to imitate.  It was funny to me how each of the girls looked different, despite using the same decorating techniques.  My best friends for this project were Americolor's Food Decorator Pens, especially when I was drawing the facial features, to get all those small details.  And, while overall, I can critique each one, once they were on the platter, I think they resembled the characters enough that they still were "like" each character enough...you know, "Anna-like" and "Elsa-like."


And, I'll take that.


A very happy birthday, to our now 4-year-old, who is definitely "worth melting for!"

Thursday, March 13, 2014

Spring Weddings (March 2014

See how optimistic I'm being with the title of this post?  I, like every other midwesterner, is completely over this never-ending winter.  Let's bring in the spring with some wedding celebrations.  I just love this design from Dolce Desserts.  I thought it was simple and elegant...just the thing for my friend's mom's wedding. 


She is using purple as her accent color, and therefore, so did I.  A nice color pop against an otherwise pretty neutral platter.


Oh, and in case you were wondering, underneath the decorated cookies are a bunch of my lemon-glazed shortbread cookies, one of her favorites, and specifically requested for this platter.  


Wishing them much happiness for their upcoming wedding this weekend!


And congratulations to my co-worker who is also getting married this month!  Today was her bridal shower at work, so I made this platter for her using the same inspired design.


Her colors are pink and grey (so pretty!).  I tried my best to replicate her simple, but very elegant full ballgown and her bouquet of pink roses.

And, for minis, I used a mini pumpkin cutter to create Sweet Sugarbelle's new rose design, accented with some sanding sugar.


Let's hope all these warm wishes melt away some of this stubborn snow! :) 

Thursday, February 13, 2014

Valentine's Day Love Letters (February 2014)

Ah, Valentine's Day.
How nice to have a break from polar vortex temperatures with a holiday that warms our souls.  Even though we don't go overboard with celebrating Valentine's Day at our house, we do love this holiday and the opportunity to formally tell those how much we love them.  

The kids have been cutting, gluing, coloring, and sticker-ing all week, making notes for their teachers, family, and friends.  Remember how much fun it was to give and get Valentine's notes at school?  Well, this year, I made mini hearts with love letters as Valentine's favors for preschool.


 When packaged in snack size bags, they looked like this.  Then, I had my daughter sign her name to a label that went on the back of the bag...great practice for writing her name!


The teachers got individual bags that were personalized for them (another good literacy activity for delivery at school).


We also made some for us to enjoy.
 

Since I was making so many mini hearts (about 500 to be exact), I wanted the designs to be interesting, but simple at the same time.


The crinkle hearts had a simple outline of matching sanding sugar, and the standard hearts had coordinating embellishments and designs.


On their own, they're not too fancy, but they looked a little more coordinated when on a serving platter or in a favor bag.


I've been collecting mail throughout the week (mostly from grandparents, friends, and relatives) and putting it in a special Valentine's bag/mailbox for each of the kids to open tomorrow on Valentine's Day.  I'm excited to see their reactions and for them to hopefully realize again and again how much they are loved. 

Happy Valentine's Day!